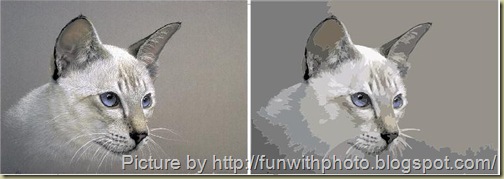
We know that we can convert our vector creation into bitmap image (See my previous tutorial Create a smoke effect in Corel Draw step 6), infect we can save it in many vector and image formats, but what you do if you have an image but you want to convert it into vector format? yes, Corel’s amazing power trace feature can easily covert your JPG or BITMAP Image into scalable vector. Before I start please keep this in your mind that, it will convert image into vector, so there are also some drawbacks of it. Like if your image is multi colored, result will get not so good. But still you can get better than the best result with some adjustments. So let’s start to learn about this amazing feature step by step.
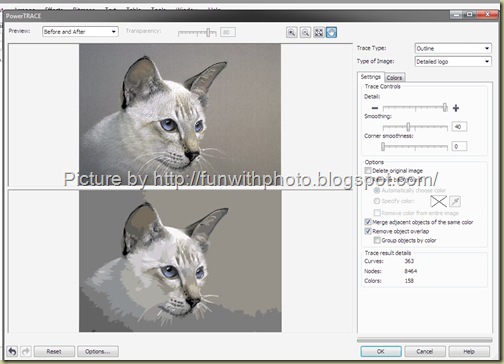
For example move your mouse on TRACE OUTLINE and click on DETAILED LOGO. In coming up next window you have trace control like DETAIL, SMOOTHING and corner smoothness. You have also options to remove background and keep original bitmap. Power tracing feature will automatically trace curves, nodes colors. You can see them at bottom.
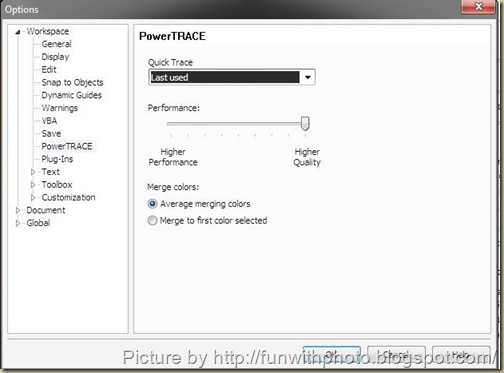
You can adjust your power tracing performance also. To do this click on OPTION button which is located on bottom left corner. In next window adjust it.
When you satisfied with your vector image click OK and you done!!! Your image is converted in to vector now but all nodes and curves are grouped, so follow this steps TOP MENUBAR > ARRANGE > click on UNGROUP or press CTRL + U.

Finally you vector image is ready… You can change any single color or shape now (want to know about shape tool? Click Here ) ….. Enjoy!!!

Please do comments if you like this Tutorial.
Final work done.

Step 1 : Importing Image.
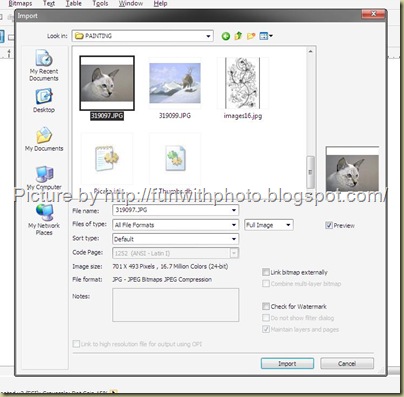
First of all open a new blank document in CorelDraw. Now import your image go to FILE in TOP MENUBAR and click on IMPORT. Find out an image which you want to covert it into vector. Please do not select very highly colored image to get a best result.
Step 2: Enable power tracing manubar
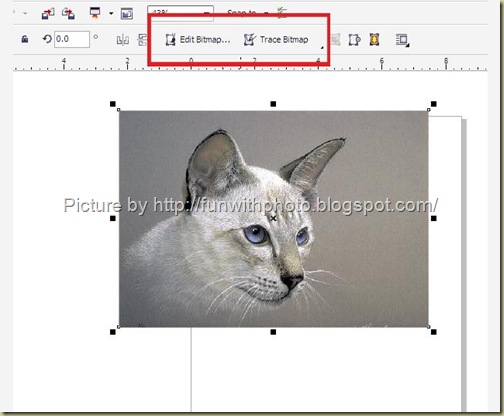
Select your image. See when you select it, power tracing menu bar options enable. You can also edit the image by clicking on EDIT IMAGE. It will be open directly in Corel Photopaint.
Step 3: Power tracing bitmap
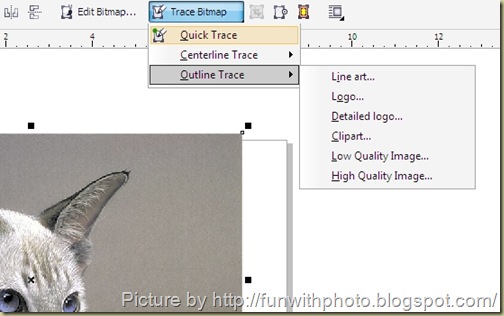
For power tracing, click on TRACE BITMAP, Now you have many option to trace your image.
For example move your mouse on TRACE OUTLINE and click on DETAILED LOGO. In coming up next window you have trace control like DETAIL, SMOOTHING and corner smoothness. You have also options to remove background and keep original bitmap. Power tracing feature will automatically trace curves, nodes colors. You can see them at bottom.

You can adjust your power tracing performance also. To do this click on OPTION button which is located on bottom left corner. In next window adjust it.

When you satisfied with your vector image click OK and you done!!! Your image is converted in to vector now but all nodes and curves are grouped, so follow this steps TOP MENUBAR > ARRANGE > click on UNGROUP or press CTRL + U.

Finally you vector image is ready… You can change any single color or shape now (want to know about shape tool? Click Here ) ….. Enjoy!!!

Please do comments if you like this Tutorial.

1 comments:
Anonymous
March 16, 2013 at 3:56 AM
Permalink this comment
1
It's actually a great and useful piece of information. I'm ѕаtiѕfied
that you ѕhaгed thіѕ uѕeful infоrmation with us.
Ρleaѕe ѕtay us up to datе lіke this.
Τhanks for sharing.
Here is my website Skiptracing
Post a Comment