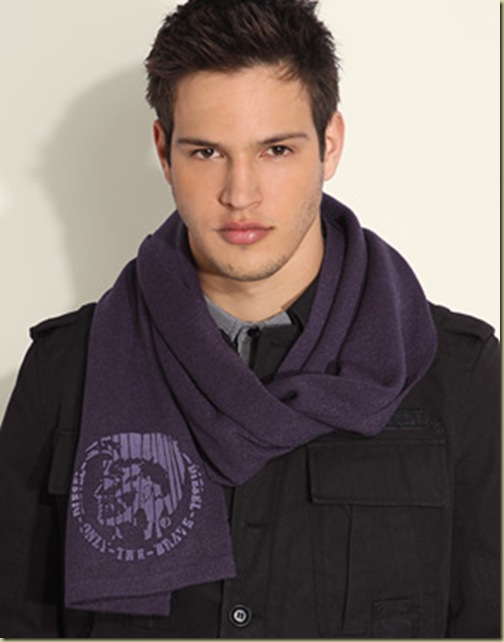
This tutorial is on Image editing through Corel Photo-paint. With the help of this tutorial you will be able to embed your face on anything you want. Its quite simple but effective.
Normally Image editors cut the face and merge it with other but sometimes face was not matched, and it clearly shown that the edit, for good quality here is a simple trick for editing.
First we have enough images for editing, for example we have two Images,
Photo – 1 and Photo – 2,
PHOTO – 1 
PHOTO – 2 (John Abraham) 
Now how to edit in Corel Photo Paint?
STEP 1: Open all pictures with Corel Photopaint, It will open with each separate window.
If you don’t like cut face, don’t worry, here is the simple way to editing without cut the face…
How to masking on Image?
STEP 2: Maximize PIC - 2 (John’s Image), Select MASK TOOL which is mostly you can see on left side of the toolbar. For masking on Image, click and hold 2 second on mask tool for deferent types of masks. (See below picture)
Step 3: With the help of RACTANGLE MASK TOOL create a mask of whole picture, Now create an object from Image follow these step : TOP MENUBAR > OBJECT > CREATE > OBJECT: COPY SELECTION or simply press CTRL + UPARROW. You can see that the whole picture is now as an object. Select it with OBJECT PIC TOOL.
Step 4: In object docker select background and delete it. (If you can’t find OBJECT DOCKER follow these steps : TOP MENUBAR > DOCKERS > OBJECT)
Step 5: Select third FREEHAND MASK TOOL
Step 6: Decide yourself which part of picture you want to mask. You can ADD or SUBSTRACT mask with CTRL and SHIFT key like these:
Step 7: Ones you satisfied with your mask, (I mean see the John’s face completely cover with the mask in above screenshot) press DELETE KEY.
Now Image is like above picture,
Step 8: Now open the Photo - 1 and repeat step 3. Copy it on clip-board (CTRL + C) and open Second window (John’s Photo) and press CTRL + V (paste) it; you can scale the image at your choice.
Step 9: Select the Photo- 1, you have to send that Image behind Photo - 2 (John’s picture) so follow this steps : MENU BAR - OBJECT > ARRENGE > ORDER > BACK ONE or press CTRL + PGDWN.
It’s look something like this:
Step 10: Select PHOTO – 1. To adjust the tone of an Image follow these steps : TOP MENUBAR > ADJUST > TONE CURV.
Step 11: Now scale and adjust Photo - 1 as you like… Select Photo – 2 (John picture) and follow the steps: MENUBAR – OBJECT > FEATHER or CTRL + SHIFT + F.
Feather it with 5 or 10), your Image’s border area will be semi transparent after feather. So both images will automatically match with each other.
Step 12: Once you satisfied with both images match, select both object in Object docker and combine them together. Then press CTRL + DOWN ARROW KEY (Object merge with background)
Final Image:
Open a file menu and export your creation to save it. You can save it in many format.
Some Tips in between your work:
- You can switch between two windows, follow these steps: - MENU BAR – Window > File 1/ File 2.
- Rollover and Roll down your mouse roller for zoom in and zoom out, you can do your work pixel to pixel.
- With “ADJUST MENU” you can adjust color, brightness, intensity, contrast, Tone etc…..
- If this simple work is not simple for you, you can use EFFECT MENU for different creativity and destroy the Image.
- Every time you need Ctrl + Z (undo) if you made a mistake. (After more practice you will less use undo)
- This is the basic tutorial; more practice would be created new Ideas in your mind…
NOTE:
- This thing can be a part of game, prank etc..... so totally for fun nothing serious.
- Don't used this to make an offensive and dirty image.
- Have sportsman spirit and enjoy editing in Image and have fun.


7 comments:
Siddharth Srivastava
May 3, 2010 at 11:28 AM
Permalink this comment
1
Another great Article by the Author.
(.Gif)images made this tutorial Very Easy To understand and implement.
Penchant Yogi
May 4, 2010 at 9:46 AM
Permalink this comment
1
mamu, u need some nice finishing touch to the snap.... both images are merge... but they dont look like a good edited one... you are a pro in corel... try some good touching yaar...
MaC
May 4, 2010 at 10:01 AM
Permalink this comment
1
@ Sam
Yea I know that brother, but actually the main concept in my mind is this tutorial is for beginner, who wants to learn corel. and that's why I ignored some other features of photopaint. Obviously the final image was not good edited. Hope you understand :)
MaC
May 4, 2010 at 10:03 AM
Permalink this comment
1
I used only that features which I mentioned in tutorial.
MaC
May 4, 2010 at 12:27 PM
Permalink this comment
1
POST UPDATED
Penchant Yogi
May 13, 2010 at 2:51 AM
Permalink this comment
1
NICE UPDATED :P :D
Anonymous
December 14, 2012 at 5:01 PM
Permalink this comment
1
Fastidious replies in return of this matter with firm arguments and
explaining the whole thing about that.
Check out my blog post :: africanmangoguide.net
Post a Comment