First of all close your eyes and imagine that how gear is look like. If you cant imagine you can search on Google’s image section (or Click here). This is just for our reference and give you an idea to draw our object. So let's start…….
Final Image:

Step 1: Draw a Polygon
First of all we need to draw a polygon drawing, so select a polygon tool from the left tool bar and draw a polygon by dragging. When you select a polygon tool, a separate polygon tool bar will be enable automatically at top.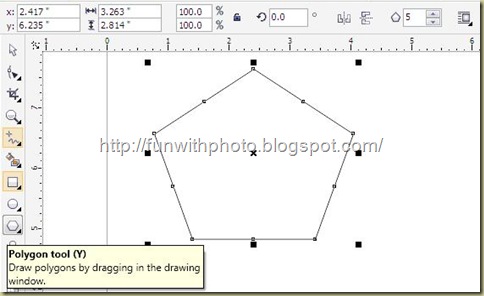
Well there are 5 sides polygon as default, but we need 16 points or sides, so look at the top. and increase points or sides option to 16 from 5. Your polygon is look like almost a circle as shown in below screenshot but it is not circle.

Step 2: Using Shape Tool
Now select a shape tool from left side tool bar. Click on any node and drag it to the center point of polygon till the shape is look like 16 threads star as shown in below image.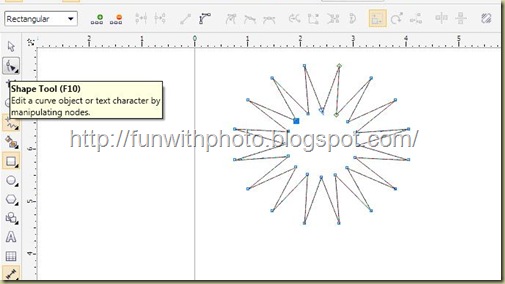
Step 3: Adding and Subtract Nodes
Make sure you selected shape tool, by double clicking you can add two nodes (see below image). These nodes will be automatically added on every teeth.
Now to make a perfect shape of teeth we need to subtract a node point which is located at the corner point of every teeth,

Double click on any one node and your object will be like shown as in below image.

Step 4: Fill Color like metallic surface.
To fill colors select an object. Remember we are going to make a 3D object, so uniform color is look so good. To create a metallic surface illusion, chose a FOUNTAIN FILL TOOL from the left side tool bar.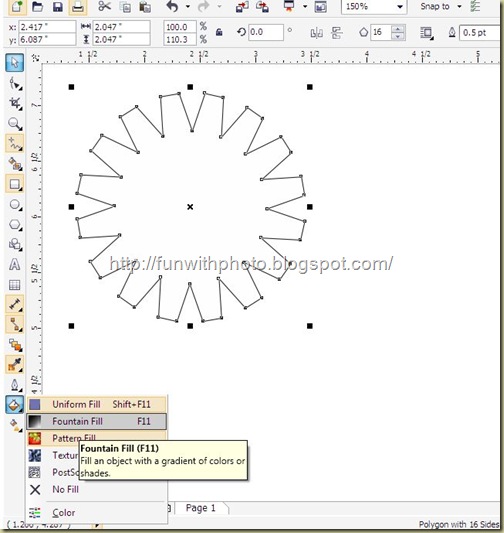
In the coming up next little window, chose any two colors light/dark combination whatever you like, set an angle, and click OK.
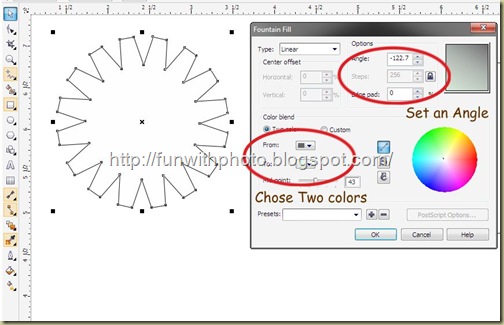
See your object is now look like metallic shiny surface.

Step 5: Draw a circle
Now draw a circle using Ellipse tool. Make sure that ratio of height and width are same for a perfect circle.
Now put the circle on our polygon star as like in below picture. when you drag circle on polygon star, it will be automatically displayed CENTER point, so you can easily put it at on center.
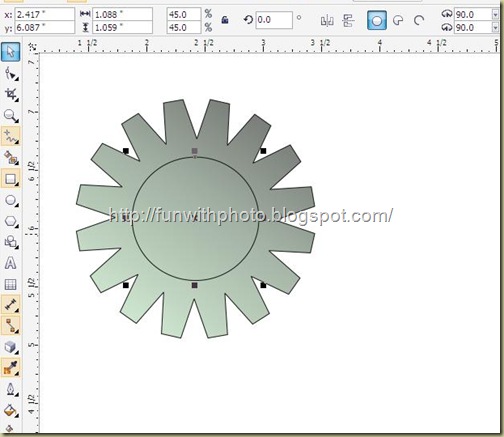
We have to remove outline of circle. Click and hold on an OUTLINE PEN TOOL and select NO OUTLINE.

Your circle is still there but without outline.

Step 6: Trim two objects.
Now click your mouse left button somewhere else and drag it to select both of objects. See at the top some tools enabled like WELD, TRIM etc….
Click on TRIM BUTTON and see your 2D gear is ready.

Step 7: Create a 3D illusion look
For create an illusion if 3D object select an EXTRUDE TOOL.
Select presets and chose any 3D example whatever you like.
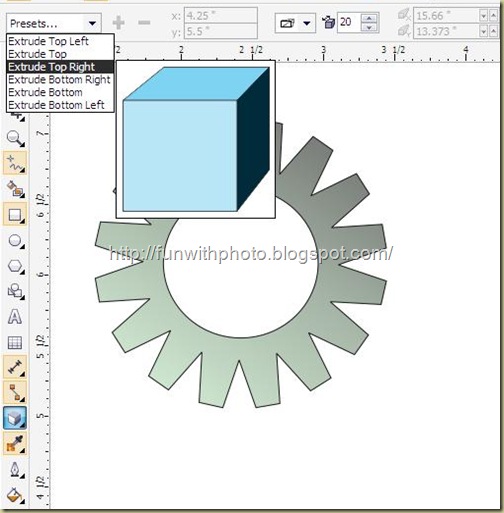
See your 2D gear converted in to 3D illusion. Set the depth of your gear object.

And your 3D gear is ready.
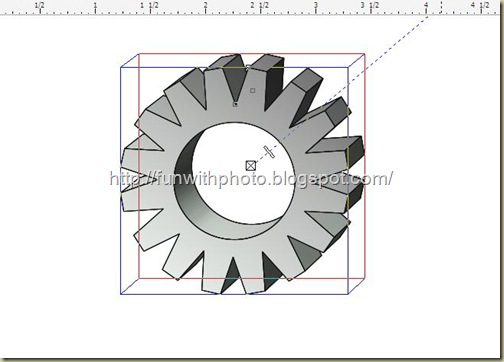
You can use it to create a logo, or whatever you need. Remember tutorial gives you an idea only. Practice will makes man perfect. Please post comments if you like this tutorial.

3 comments:
Anonymous
July 28, 2012 at 4:00 AM
Permalink this comment
1
I'm truly enjoying the design and layout of your website. It's a very easy
on the eyes which makes it much more pleasant for me to come here and visit more often.
Did you hire out a developer to create your theme? Superb work!
Look at my web-site fancy dress ideas for wonderland party
Anonymous
April 30, 2013 at 11:19 PM
Permalink this comment
1
Hi there, this weekend is good in favor of me, as this occasion i am reading this fantastic educational
piece of writing here at my home.
Visit my webpage ... online stopwatch countdown.
Anonymous
May 19, 2013 at 8:58 AM
Permalink this comment
1
Magnificent beat ! I wish to apprentice at the same time as you amend your site, how could i subscribe for a blog website?
The account helped me a appropriate deal. I were a little bit acquainted of this your broadcast provided shiny clear concept
Also visit my website;
Post a Comment