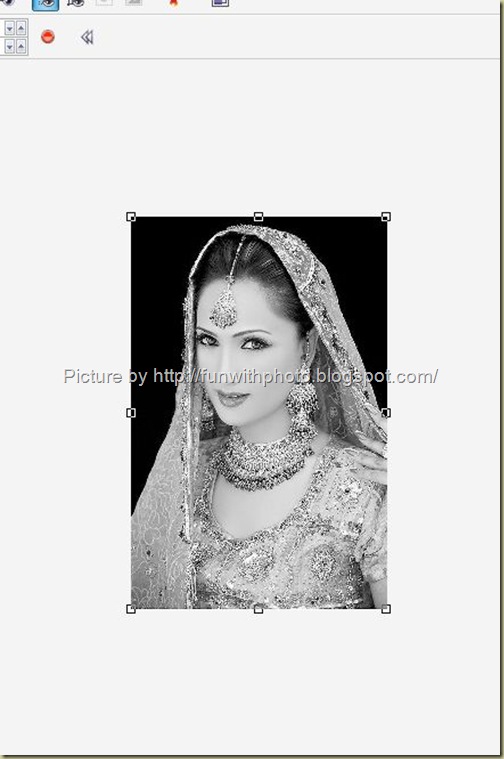
Many times you saw in wedding photo album, an artist made a photo of bride which is exposed only bride’s jewelries, and you surprised that how he do black and white photo with colored jewelry. Jewelry companies were also used this method for advertising. Well, the basic advantage is that your eyes always concentrate on colored things, so your subconscious mind attract only on jewelries. yes Corel Photopaint can do this, I am going to post my own made trick to do this thing. After this tutorial you lost your surprise from your mind because anyone can do this who know some basic knowledge of Image manipulation.
Final Image:
STEP 1 :
Well first of all we need color and black and white both images so for our convenience make a duplicate copy of bride’s Image.
STEP 2: Opening Files
Open both Images in Corel Photopaint. These will open in two separate windows.
STEP 3: Convert colored image into grayscale.
Now maximize any one image. To convert your colored Image into Grayscale, follow these steps.
TOP MENUBAR > IMAGE > Convert to > Grayscale(16 bit)
STEP 4: Masking
With the help of RECTANGLE MASK TOOL masked on whole picture as shown in be below screenshot.
STEP 5: Create an Object
Now you have to create an object from this image so follow these step.
TOP MENUBAR > OBJECT > CREATE > OBJECT: COPY SELECTION or press CTRL + UPARROW.
You can see your whole image is now as an object.
STEP 6: Copy and Paste Object.
Now copy this object to clipboard, I mean to say press CTRL + C. Open our another colored photo’s window and paste that grayscale object on it. Now your grayscale object over on colored image, make sure both images are perfectly matched with each other (Don’t worry when you paste it they matched perfectly).
STEP 7: Erase grayscale image’s jewelry part
Now here in this step you will find that surprise trick. Select EREASER TOOL from left side TOOL BAR, and carefully erase grayscale image’s jewelry part only. You can zoom in your image for more perfection. For Zoom in and Zoom out Roll-over and Roll-down your mouse Roller.
STEP 8: Saving
Export your work in .JPG format.
Done!!!
Final Image:
See the difference between original edited image in below screenshot.
If you found this tutorial is useful for you, please do comments.


4 comments:
Amogh
May 11, 2010 at 6:52 AM
Permalink this comment
1
Hey really nice..nice effect
MaC
May 11, 2010 at 8:49 AM
Permalink this comment
1
Thanks Amogh :)
Anonymous
May 11, 2010 at 8:59 PM
Permalink this comment
1
Nice post
---
Keep it up
Anonymous
May 23, 2013 at 2:40 AM
Permalink this comment
1
I'm really enjoying the design and layout of your site. It's a very easy on the eyes which makes it much more
pleasant for me to come here and visit more often.
Did you hire out a developer to create your theme?
Great work!
my website ... first paper towels
Post a Comment